Fold along the dotted-line #edtech
How much emphasis or importance do you place on the set of instructions you provide when supporting colleagues, students, stakeholders, etc? Do you put thought and effort into creating them so they’re accessible and easy to understand at all levels of ability, produce them quickly with enough detail for most people to figure it out, or keep churning out the same old resources from years ago?
I don’t think anyone would own up to the latter (it doesn’t seem very helpful does it) and I would hope that we can strive to achieve the former.
In order to fully appreciate what is needed when developing support materials, I put myself in the shoes of a fresh student who knows nothing about the environment they’re about to be expected to use: turned to something I know absolutely nothing about – origami! How hard can it be, right?I deliberately searched for a website that had simple and advanced instructions so I could try one method (hard) while having the back-up of the other (easy). So I tried to make a paper crane (bird).

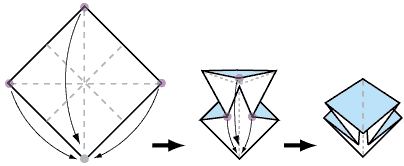
Paper ‘fold-here’ instructions

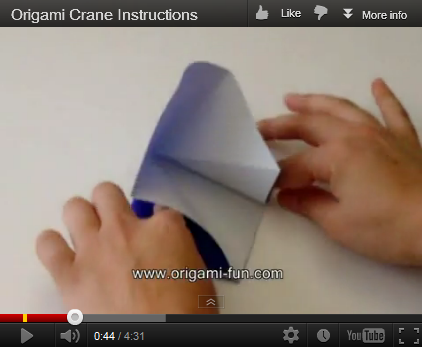
Video instructions showing intricacies of folding action
Not all websites with patterns for origami had both types of instructions, therefore allowing (or not) the ‘student’ to choose their own way to learn how to make the crane. If you’re interested, here’s one I made earlier … ! Not bad for a first attempt?
What I learned from this, for this very visual activity, is that I needed both types of fold-instructions to fully understand the techniques and the fact that I needed to turn the paper over and do some more on the other side. I started with the paper-based set as I was too impatient to wait for the video to get started, then turned to the video when the paper version didn’t have enough detail or didn’t explain itself properly.
Student inductions are always a time when we need more time and more opportunity to show the students the tools they have at their disposal, and how to use them properly. If we’re lucky we get a 60 minute slot in their busy first week: usually nestled between the first talk from their School’s Dean or programme team and a lunch … and in some instances actually in place of a break for lunch!
Using a PowerPoint presentation to highlight the different elements of a student (IT/VLE/Library) induction is only going to go so far before the students switch off … and you know that in 11 weeks you’ll get the “how do I submit an assignment?” or “how do I download the eBook?” questions several hundred times over. Why not do something during this 60 minute session to give the students a hands-on approach to a task, and therefore a learn-by-doing approach which they are more likely to remember?
Can inductions be ‘flipped’ so students have activities and reading before they arrive to maximise the time you have with them? Will students engage with a set of instructions pre-induction (probably sent with the welcome letter) for logging in and/or registering with services (VLE, email, Library, etc)? Will it be enough so that you don’t spend a lot of the face-to-face time with the students going over the materials they should have done on their own? The problem with flipping the induction is that students are likely to be using systems they are unfamiliar with: remember to take student profile into account as well – mature or part-time students may want more hand-holding and detailed guidance than others, and pre-induction activities may backfire if they go wrong.
What do you do, and how do you do it? How do you manage to get everything you and the students need into a short time slot? Is it possible to develop a repeatable and reusable set of resources and activities for student IT/VLE induction that are not just ‘watch-this’ videos?


… and for those of you who want to make it really hard for yourself, why not try the origami Yoda??
“How to make an origami Yoda” http://io9.com/5826172/how-to-make-an-origami-yoda
All the best, David